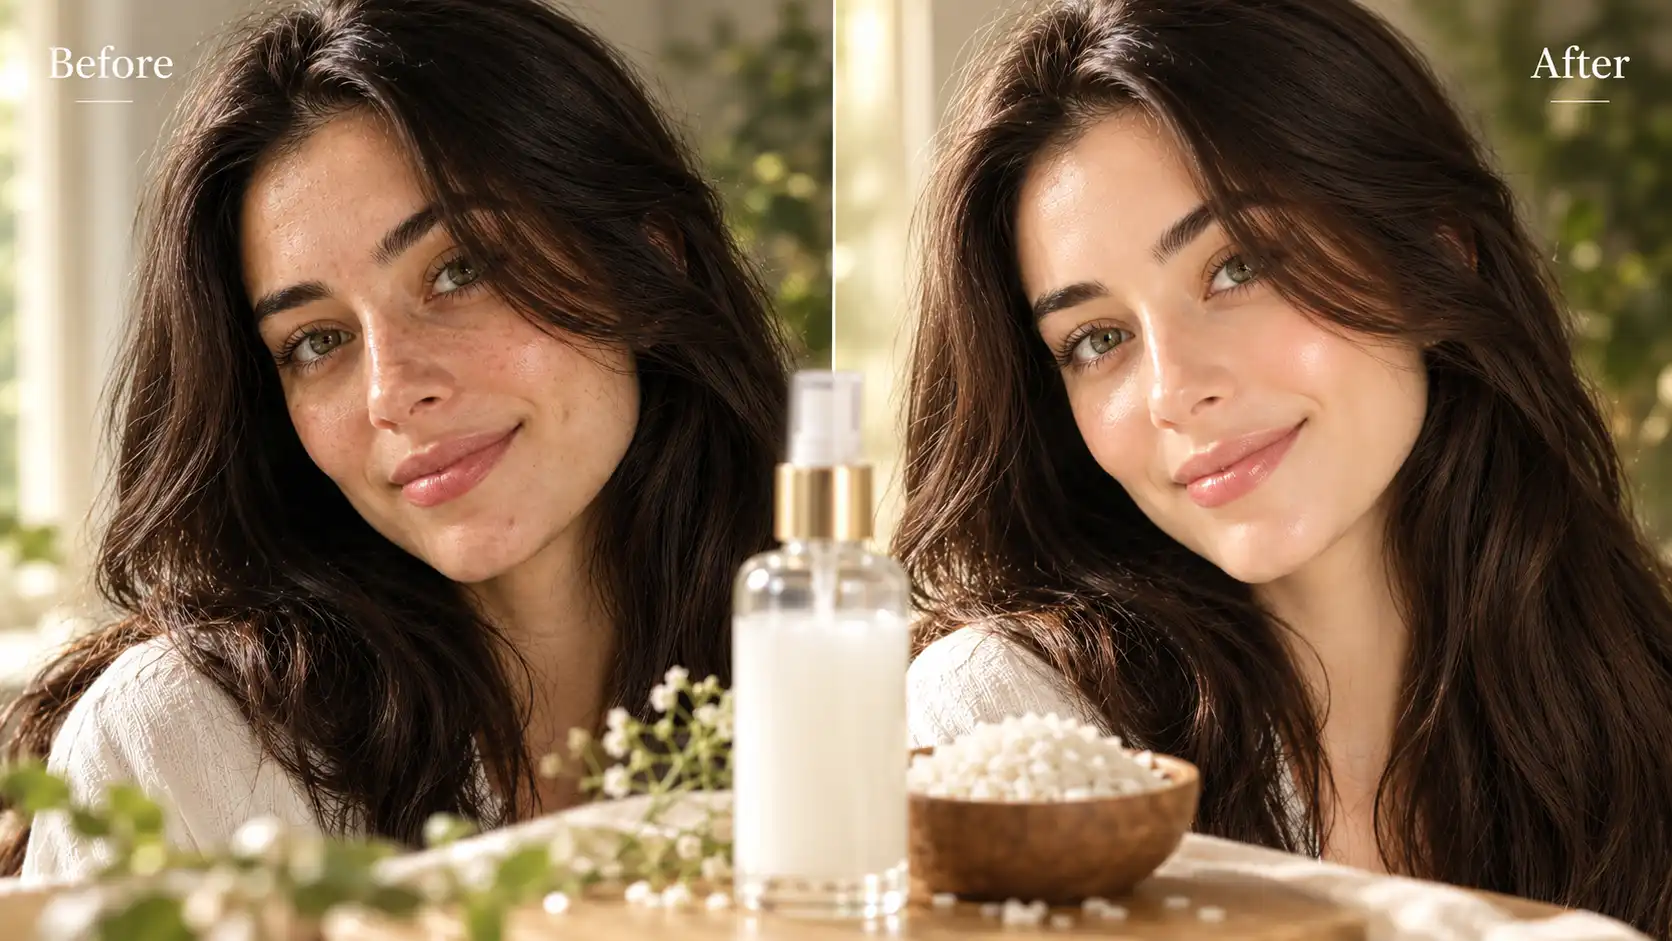
If you have been chasing that flawless, luminous, and poreless complexion seen all over social media, you are probably familiar with the Korean skincare routine. But before you spend hundreds of dollars on luxury brightening serums and chemical exfoliants, you need to know about the ancient, zero-cost secret behind true K-beauty perfection. After dealing with stubborn dullness and lingering acne marks, I decided to test the ultimate clear skin hack: a homemade DIY rice water toner.
I committed to a strict 7-day challenge using only this natural ingredient, and the transformation completely blew my mind. Within a week, my stubborn dark spots visibly faded, my overall complexion brightened, and my pores tightened to create a smooth, reflective canvas. If you want to unlock extreme rice water for glass skin results, I am breaking down the exact science, the proven boiling and fermenting recipes, and the #1 mistake you must avoid to keep your skin glowing!
Table of Contents
The Korean Glass Skin Secret: Why I Tried the 7-Day Rice Water Challenge
If you’ve spent any time on beauty TikTok or Pinterest, you already know the ultimate K-beauty standard: “glass skin”. It is that luminous, poreless, and highly reflective complexion that looks effortlessly flawless. While the market is flooded with expensive Korean serums promising this exact result, the truth is that the most powerful skin-brightening secret has been sitting right in our kitchen cabinets.
Recently, my skin was going through a seriously rough patch. I was dealing with unexpected acne breakouts, a chronically dull complexion, and those incredibly stubborn dark spots that pimples always leave behind. Because I had already seen massive success using The Ultimate DIY Rice Water Recipe for Extreme Hair Growth on my strands, I decided to take on the viral 7-day rice water challenge for my face to see if it could actually clear up my complexion.
The proof is in the results, and honestly, they were insane. By consistently applying my homemade DIY rice water toner, the transformation was visible almost immediately. Within just seven days, my lingering acne marks and dark spots had completely faded away. My open pores visibly shrank and tightened, giving my face a much firmer, smoother texture. Instead of looking tired and dull, my skin tone completely evened out and developed a next-level, radiant glow—turning my skin into a perfectly clear, flawless canvas.
If you want to explore the complete multi-step routine, experts at Byrdie have a fantastic guide on [achieving the Korean glass skin look].
The Science Behind the Glow: How a DIY Rice Water Toner Transforms Your Skin
Before you write this off as just another internet trend, there is actual, proven chemistry behind why a DIY rice water toner works so well. Long before expensive serums and chemical exfoliants existed, women relied on this simple grain because of the intense way it interacts with the skin. Here is exactly what is happening on a microscopic level when you apply it to your face:
- The Creation of Kojic Acid: The real magic happens during the fermentation process. When you allow rice water to ferment, it naturally creates a compound called kojic acid. This is a highly potent brightening agent that is frequently extracted and sold in expensive, high-end skincare serums. It is the exact compound responsible for fading dark spots, treating hyperpigmentation, and giving you that translucent, glowing glass skin look.
- A Powerful Natural Astringent: If you struggle with large, visible pores or excessively oily skin, rice water acts as a completely natural astringent. It effectively cleans out your pores and controls excess sebum production without stripping your skin of its natural moisture. This natural tightening effect is what gives your face that smooth, flawless, and poreless finish.
- An Anti-Aging Nutrient Powerhouse: Raw rice is incredibly rich in skin-loving nutrients, specifically Vitamin B and Vitamin E. It is also loaded with antioxidants that fight off free radicals and slow down the signs of aging, keeping your skin looking youthful and plump. If you have sensitive skin or active acne breakouts, these nutrients deeply soothe redness and calm severe inflammation.
For more details on how this powerful ingredient lightens sun damage and scars, you can read this medical overview on [kojic acid benefits by Healthline].
Pro Tip: Because this liquid is so packed with vitamins and antioxidants, you never want to throw any extra away. You can easily use your leftover batches on your scalp to stimulate your hair follicles! If you want to see how that works, check out my full guide on The Ultimate DIY Rice Water Recipe for Extreme Hair Growth.
How to Make DIY Rice Water Toner: 3 Tested Methods
Creating your own DIY rice water toner at home is incredibly simple, but using the correct extraction technique is vital to ensure you get the skin-clearing benefits without exposing your pores to dirt or pesticides. Depending on your specific skin goals, here are the three most effective, proven methods to prepare it.
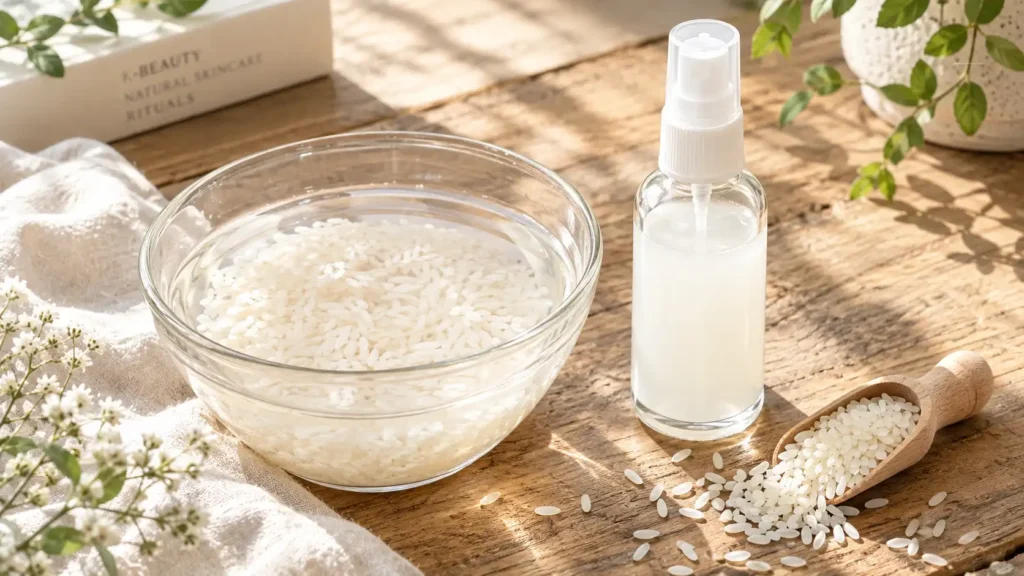
Method 1: The 48-Hour Fermented Toner (For Extreme Glow & Pigmentation)
This is the ultimate traditional method used to naturally generate kojic acid, making it the best choice for fading dark spots and achieving glass skin.
- Step 1: Take 100g (about 2 to 3 tablespoons) of raw white rice, such as Basmati. Wash it thoroughly 2 to 3 times, rubbing the grains with your fingers to completely remove all dust, impurities, and harsh agricultural pesticides.
- Step 2: Place the clean rice in a bowl and soak it in 1 to 1.5 cups of fresh, filtered water overnight.
- Step 3: The following morning, strain the water into a clean glass jar (you can save the actual rice grains for cooking). Cover the jar and leave it sitting at room temperature for 24 to 48 hours to allow it to fully ferment.
- Note: As the water ferments, you will notice a slightly sour smell developing; this is completely normal and means the chemical process is working effectively.
Method 2: The Milky Rice & Oat Toner (For Acne & Hydration)
If you have highly sensitive, dry, or acne-prone skin, this moisturizing version combines the brightening power of rice with the soothing, zinc-rich properties of oats.
- Step 1: Take 2 tablespoons of clean rice and 2 tablespoons of plain oats. Soak them together in a bowl of filtered (RO) water overnight.
- Step 2: In the morning, strain the liquid and set it aside—it will already have a slightly milky appearance. Take the soaked rice and oats, place them in a grinder with a tiny splash of water, and blend them into a fine paste.
- Step 3: Mix this freshly ground paste back into your milky water, stir it vigorously to extract all the deep nutrients, and then strain the entire mixture one last time into your toner bottle.
Method 3: The Boiled “Starch” Method (For Skin Tightening)
This quick, heat-extracted method yields a slightly thicker liquid that is incredible for tightening open pores, firming the skin, and providing an instant lifted feeling.
- Step 1: Thoroughly wash 2 tablespoons of white rice.
- Step 2: Place the clean rice in a pot with 2.5 cups of water. Bring it to a boil and let it simmer down until only about 1 cup of highly concentrated starchy water remains.
- Step 3: Remove the pot from the heat, let the water cool completely to room temperature, and transfer it into a clean spray bottle.
Pro Tip: If you ever make a batch that is too large for your face, do not throw it away! You can easily repurpose the extra liquid into a powerful scalp treatment. Check out my full guide on The Ultimate DIY Rice Water Recipe for Extreme Hair Growth to maximize your beauty routine.
The “Secret Add-Ins” to Supercharge Your Toner
While pure fermented rice water is incredible on its own, it can sometimes leave a slightly tight or stretchy feeling on the face as it dries, especially if you have a dry or combination skin type. To elevate your basic DIY rice water toner into a premium, luxury K-beauty elixir, you need to add a few targeted ingredients directly into your spray bottle.
- 1/2 Teaspoon Vegetable Glycerin: Adding just a half teaspoon of vegetable glycerin acts as a powerful humectant, pulling moisture directly into your skin so it does not feel tight or dry. This simple addition is the secret to achieving that deeply hydrated, plump, and bouncy glass skin texture.
- 1/2 Teaspoon Aloe Vera Gel: If you want to turn your liquid spray into a soothing, moisturizing base, mix in a half teaspoon of pure aloe vera gel. It instantly calms redness, treats all skin types, and prevents the water from drying out your complexion. If you love the hydrating power of this plant for your face, you can also use it to completely transform your scalp—check out my full guide on How to Use Aloe Vera for Hair Growth: The Ultimate 7-Day DIY Routine to maximize your natural beauty regimen.
- Vitamin E or Tea Tree Oil: You can completely customize your toner based on your current daily skin struggles. Break open and squeeze in a Vitamin E capsule if you have severely dry, flaky skin to lock in deep nourishment. If you are actively breaking out or have a highly acne-prone skin type, add a few drops of Tea Tree oil to create a powerful, natural antibacterial spot treatment.
My Exact Application Routine for Maximum Results
Having the most potent DIY rice water toner won’t do you much good if you apply it over dirty pores or use the wrong technique. During my 7-day challenge, I discovered that splitting the application into a specific morning and evening routine delivers the fastest, most dramatic glass skin results. Here is the exact daily regimen you need to follow:

The Morning De-Puffing Ice Cube
Start your morning by instantly waking up and tightening your skin. Instead of just spraying the toner, take the concentrated liquid from the Boiled “Starch” Method and freeze it into a standard ice cube tray (or a silicone facial ice roller).
- How to use it: First thing in the morning, immediately after splashing your face with water, take one of these starchy ice cubes and gently rub it all over your face, focusing on your under-eyes and cheeks.
- The Benefits: The extreme cold combined with the nutrient-dense rice starch works instantly to eliminate morning swelling, visibly shrink open pores, and tighten the skin to treat early signs of aging. It acts as the perfect natural primer, keeping your face oil-free and glowing for the rest of the day.
The Evening Overnight Soak
Your nighttime routine is when your skin naturally repairs itself, making it the perfect time for the heavy lifting. This is where the fermented method truly shines.
- Step 1: The Double Cleanse: Never apply toner over a dirty face! Always start your evening routine with a thorough double cleanse—use an oil-based cleanser to melt away your SPF and makeup, followed by a gentle foaming cleanser.
- Step 2: The Application: Once your skin is perfectly clean and dry, take your fermented DIY rice water toner and apply it generously all over your face using a fine mist spray bottle or a soaked cotton pad. Do not just wipe it! Use your fingertips to gently tap and pat the liquid deep into your pores until it is completely absorbed.
- Step 3: Let It Work: Here is the golden rule—do not wash it off! Leave the toner on your skin overnight. While you sleep, the natural kojic acid will work its magic to aggressively fade acne scars, dark spots, and hyperpigmentation. Simply wash your face as normal the next morning.
Pro Tip: If you made a large batch of fermented water and have extra sitting in your fridge, do not let it go to waste! You can actually use that same nutrient-rich liquid as a powerful overnight scalp treatment. Check out my complete guide on The Ultimate DIY Rice Water Recipe for Extreme Hair Growth to see how you can transform your hair while you sleep!
The 3 Biggest Mistakes People Make with DIY Rice Water
If you are not seeing the glass skin results you expected, you might be accidentally sabotaging your own routine. Here are the three most common mistakes people make when creating their DIY rice water toner:
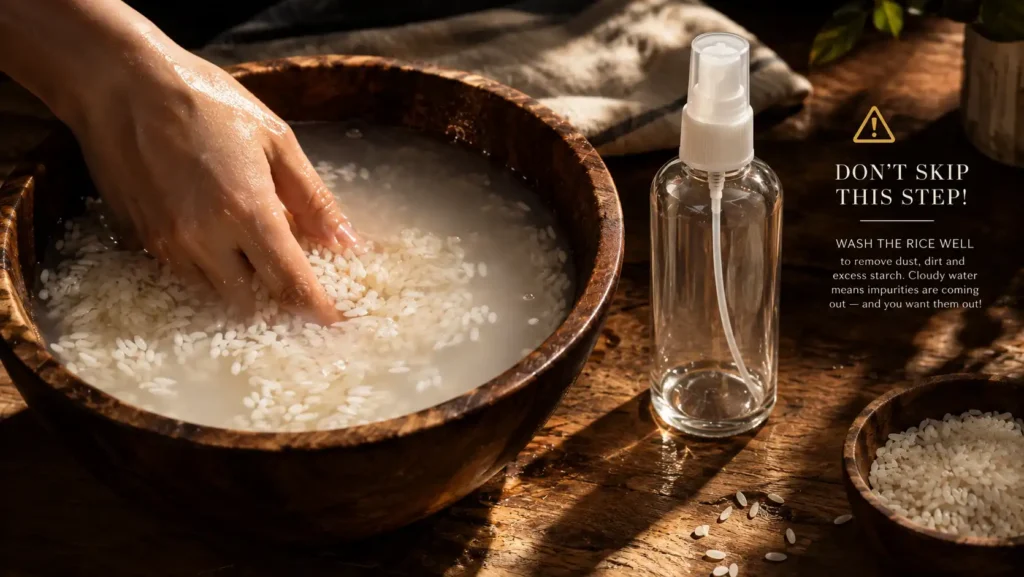
Mistake 1: Not Washing the Rice
Skipping the very first wash is a massive skincare sin! If you do not thoroughly rinse your rice before soaking it, you are literally brewing a toner filled with agricultural pesticides, dust, and dirt, and then spraying it directly into your open pores. Always wash your rice 2 to 3 times until the water runs relatively clear before starting the actual fermentation or boiling process.
Mistake 2: Storing it Outside the Fridge
Once your mixture has reached the perfect level of fermentation (usually after 24 to 48 hours), the toner must be kept in the refrigerator. The cold temperature stops the active fermentation process and prevents the liquid from spoiling. Depending on the extraction method you used, it lasts about 3 to 14 days in the fridge. Just like when preparing our viral Clove Water for Hair Growth: The Viral DIY Spray for Extreme Thickness, natural DIY recipes without synthetic preservatives will quickly go bad if left sitting on a warm bathroom counter!
Mistake 3: Using Polished Rice
For the absolute best results, always try to use raw, unpolished white rice (like organic Basmati). Highly processed and chemically polished rice has been heavily stripped of its outer layers, which is exactly where the skin-loving vitamins, minerals, and antioxidants live. To get maximum nutrient extraction for your DIY rice water toner, keep your ingredients as natural and unrefined as possible.
Frequently Asked Questions (FAQ)
How long does homemade rice water toner last in the fridge? A freshly made batch will typically last anywhere from 3 to 14 days when stored properly in the refrigerator. The boiled starch method usually spoils faster (around 3 to 4 days), while the fermented method can last a bit longer. If it ever starts to smell completely rotten or develops mold, discard it immediately and make a fresh batch.
Can I use rice water on my face every day? Absolutely! A DIY rice water toner is incredibly gentle, free of harsh chemicals, and naturally soothing, making it completely safe for daily use. For the fastest glass skin results, you can use it twice a day—once in your morning routine to de-puff and prep the skin, and once at night to let the active nutrients work while you sleep.
Why does my fermented rice water smell bad? If you used the 48-hour room-temperature soaking method, a slightly sour or pungent smell is exactly what you want! That unique scent means the natural fermentation process was successful and the active skin-brightening compounds (like kojic acid and antioxidants) have been fully released into the water. It might smell a bit strong, but that is the true secret to fading dark spots. (If you are curious about how this powerful fermented ingredient performs on the scalp compared to other herbs, check out our deep-dive on Rosemary Water vs. Rice Water for Hair Growth: Which Actually Works?).
5 thoughts on “The Best DIY Rice Water Toner for Flawless Glass Skin: My 7-Day Secret”