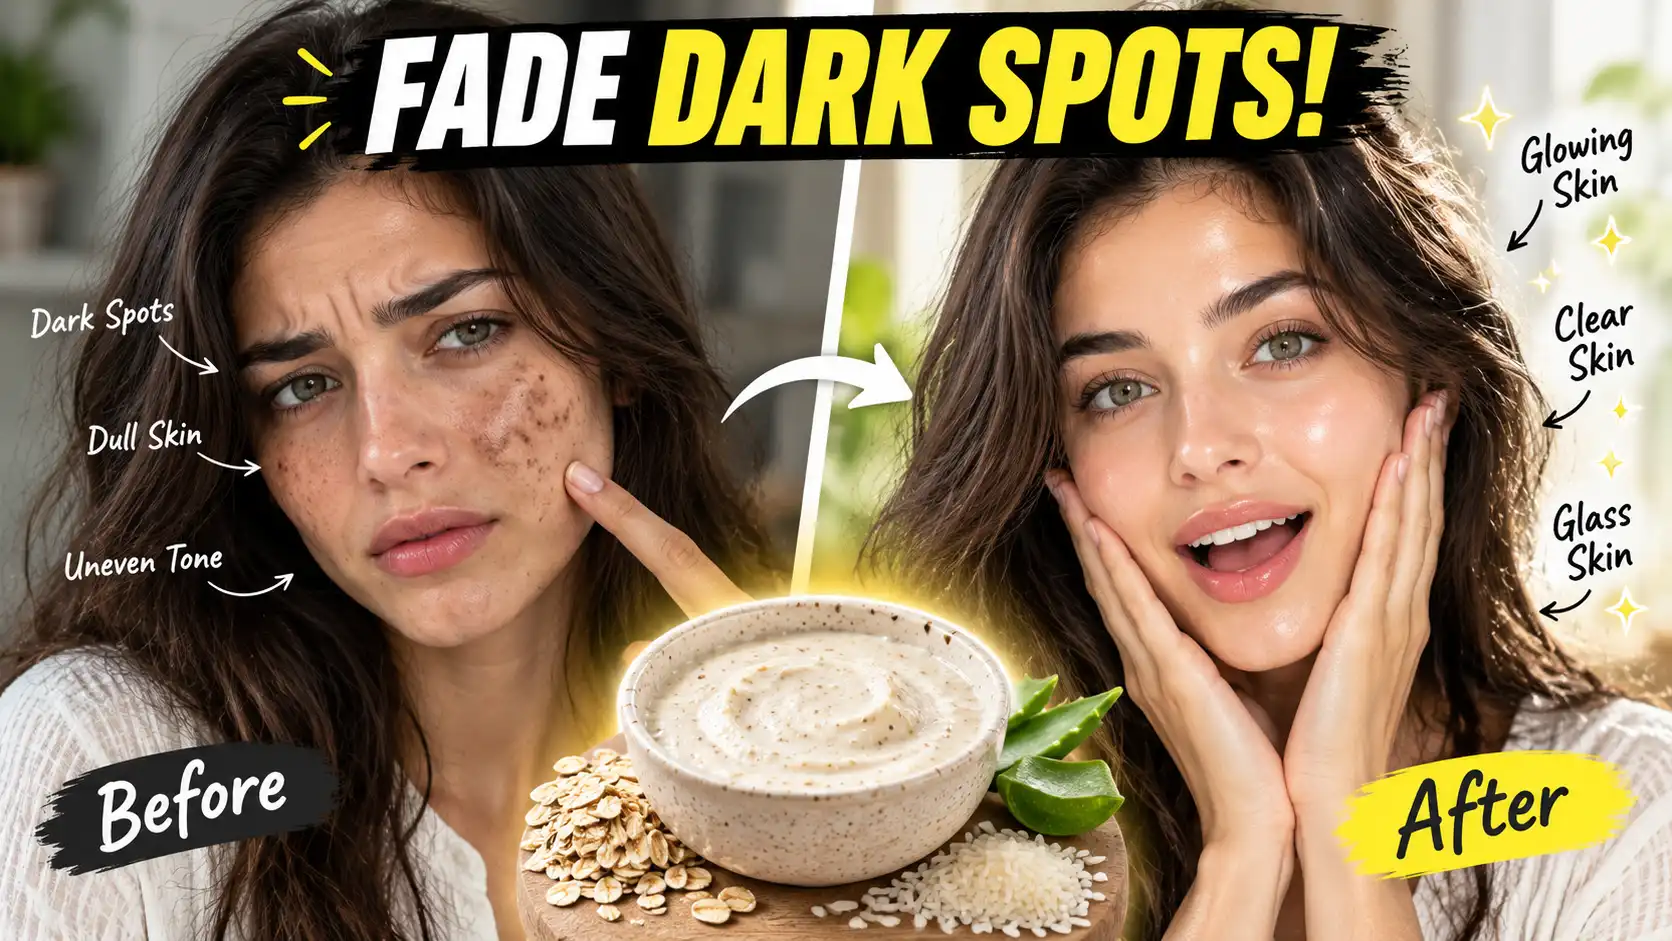
Let’s be completely honest: dealing with dark spots can be incredibly frustrating. You wake up, look in the mirror, and despite trying every expensive Vitamin C serum, acid peel, and brightening cream on the market, those stubborn little marks just won’t seem to fade. Whether they are leftover souvenirs from a bad acne breakout or the result of spending a little too much time in the sun without SPF, hyperpigmentation can seriously take a toll on your confidence.
But before you spend another hundred dollars on luxury chemical treatments, you might want to look inside your kitchen pantry. K-beauty experts have relied on natural, gentle grains for centuries to achieve that flawless, translucent glass skin. Today, we are going to break down exactly how to make a highly effective DIY rice and oat face mask that naturally soothes irritation, gently exfoliates, and helps fade those stubborn dark spots safely over time.
(If you are already using our viral DIY Rice Water Toner for glass skin, this face mask is the absolute perfect companion to speed up your results!)
Table of Contents
1. Why Do Dark Spots Actually Happen?
Dark spots can show up for many different reasons, and understanding the cause is important before trying any brightening treatment. A DIY rice and oat face mask may help your skin look smoother and more refreshed, but it is also important to understand what is causing the pigmentation in the first place.
Dark spots are usually areas where the skin has produced more melanin than usual. This can happen after a pimple heals, after too much sun exposure, because of hormonal changes, or after repeated skin irritation.
Here are some of the most common reasons you may notice dark spots or uneven-looking skin.
Post-Acne Marks
If you have ever noticed a brown or darker mark where a pimple used to be, you have probably experienced post-acne hyperpigmentation.
When a pimple becomes inflamed, the skin can respond by producing extra melanin. Even after the acne itself disappears, that extra pigment can remain behind for weeks or months.
This is one reason why you may feel like your acne is gone but your skin still does not look even.
The good news is that these marks often become lighter gradually with consistent, gentle skincare. The key is to avoid picking or squeezing pimples because additional inflammation can make the resulting marks darker.
A gentle routine is usually more helpful than constantly trying harsh scrubs or strong DIY treatments.
Sun Exposure
Sun exposure is another major reason dark spots can become more noticeable.
UV radiation can stimulate melanin production as part of the skin’s natural defense system. If you already have acne marks or pigmentation, regular sun exposure can make those areas look darker and can also contribute to an uneven overall skin tone.
This is why using a brightening mask without protecting your skin from the sun can be disappointing. You may spend time trying to improve the appearance of dark spots while daily UV exposure continues to encourage pigmentation.
For a complete skincare routine, think of a DIY rice and oat face mask as a supportive step, not the entire solution. Daily sun protection is one of the most important habits when your goal is a more even-looking complexion.
Hormonal Pigmentation
Hormonal changes can also contribute to pigmentation.
Some people develop darker patches during periods of hormonal fluctuation, including pregnancy or while using certain hormonal medications. Hormonal pigmentation can sometimes appear as larger, uneven patches, particularly on areas of the face that receive regular sun exposure.
This type of pigmentation may behave differently from a simple post-acne mark. A homemade face mask may make your skin feel softer and look temporarily brighter, but it should not be treated as a guaranteed solution for hormone-related pigmentation.
If pigmentation keeps spreading, becomes very noticeable, or does not improve over time, a dermatologist can help identify the underlying cause and suggest appropriate treatment.
Skin Inflammation or Irritation
Sometimes the products you use to improve your skin can actually contribute to the problem.
Over-exfoliating, aggressively scrubbing the face, using too many active ingredients, or applying irritating DIY mixtures can damage the skin barrier. When skin becomes irritated or inflamed, it can sometimes develop darker areas afterward.
This is especially important if you are already dealing with sensitive or acne-prone skin.
A simple approach is often better: cleanse gently, moisturize, protect your skin from the sun, and avoid constantly switching between strong treatments.
The goal of a DIY rice and oat face mask should be to complement a gentle skincare routine—not replace it.
Dark Spots vs. Uneven Skin Tone: What’s the Difference?
Dark spots and uneven skin tone are related, but they are not exactly the same thing.
Dark spots are usually specific areas of pigmentation that appear darker than the surrounding skin. Examples include acne marks, sun spots, or individual areas of hyperpigmentation.
Uneven skin tone is a broader term. It can refer to a complexion that looks inconsistent overall, with areas that appear darker, redder, duller, or more pigmented than others.
For example, you might have a few brown acne marks on your cheeks while the rest of your face simply looks dull or uneven. These are two different concerns and may require different approaches.
A DIY rice and oat face mask can be included in a gentle routine focused on making the skin feel smoother and look refreshed, but it is important to have realistic expectations about what a homemade mask can accomplish.
2. Can a Rice & Oat Face Mask Really Help Dark Spots?
This is probably the biggest question if you are considering making a DIY rice and oat face mask.
The honest answer is: it may help your skin look brighter, softer, and more refreshed, but you should not expect it to completely erase dark spots.
DIY skincare recipes are often presented online as miracle treatments that can remove pigmentation in just a few days. Real skin usually does not work that way.
Dark spots form for different reasons, and how quickly they fade depends on factors such as the type of pigmentation, your skin’s response to inflammation, sun exposure, and your overall skincare routine.
What Can a DIY Rice and Oat Face Mask Realistically Do?
A rice and oat mask can be a simple way to add a soothing, skin-softening step to your routine.
Oats are especially well known for their skin-soothing properties. Properly prepared oats can help support the skin barrier and may be useful for skin that feels dry or irritated.
Rice is also commonly used in traditional and modern DIY skincare routines because rice-based preparations can leave the skin feeling smooth and refreshed.
When combined, these ingredients can create a gentle homemade mask that may make your complexion look temporarily brighter and feel softer after use.
However, there is an important difference between making your skin look brighter and actually reducing the underlying pigment responsible for a dark spot.
Brightening Is Not the Same as Permanently Removing Pigmentation
The word “brightening” can be confusing.
When skincare products or DIY masks are described as brightening, it does not necessarily mean they are removing pigmentation permanently.
Brightening can simply mean that the skin looks more fresh, smooth, hydrated, or even-toned.
A dark spot, on the other hand, is a concentration of excess pigment. Changing that pigmentation generally takes more time and may require targeted skincare ingredients or professional treatment, depending on the cause.
So, if you use a DIY rice and oat face mask and your skin looks more radiant afterward, that does not necessarily mean the dark spot itself has disappeared.
This distinction can help you avoid unrealistic expectations and prevent the temptation to use a mask too frequently or scrub your skin aggressively.
What Kind of Results Should You Expect?
Think of this mask as a gentle supportive treatment rather than a quick-fix dark spot remover.
After using a homemade rice and oat mask, your skin may feel:
- Softer
- Smoother
- More refreshed
- Less dry
- Temporarily brighter-looking
Visible changes in pigmentation are a different matter.
If a dark spot developed after acne or sun exposure, it may take considerably longer to fade than the time it takes for your skin to feel soft after one mask.
Consistency also matters. A gentle skincare routine that includes sun protection is generally more useful than using a homemade mask aggressively for a few days and then stopping.
If you enjoy DIY skincare, you may also like our guide to The Best DIY Rice Water Toner for Flawless Glass Skin: My 7-Day Secret, which explores another rice-based skincare preparation.
The same basic principle applies: simple skincare can be useful, but it should not be presented as a guaranteed overnight solution.
3. Why Rice and Oats Are Used in DIY Skincare
Rice and oats have become popular ingredients in homemade skincare for a reason. Both are simple, inexpensive ingredients that can be prepared in different ways and incorporated into gentle skincare routines.
But popularity alone does not mean that a DIY treatment can solve every skin concern.
The appeal of a DIY rice and oat face mask is that it combines two familiar ingredients that can provide a simple, soothing skincare experience without requiring a long list of complicated ingredients.
Let’s look at what each ingredient brings to the mask.
Benefits of Rice for Skin
Rice has been used in traditional beauty routines for generations, particularly in parts of Asia.
In DIY skincare, rice is commonly prepared as rice water, cooked rice paste, or finely processed rice. These preparations are often used because they can leave the skin feeling smooth and refreshed.
Rice-based skincare can be especially appealing if you prefer simple homemade routines with ingredients that are already available in your kitchen.
However, it is important not to confuse traditional use with proven treatment for pigmentation. There is not enough evidence to say that a homemade rice mask can reliably remove dark spots or permanently lighten pigmentation.
The more realistic benefit is that a properly prepared rice-based mask may contribute to a smooth, soft, refreshed-looking complexion.
If you are interested in rice-based beauty routines, you can also read our related guide on The Ultimate DIY Rice Water Recipe for Extreme Hair Growth.
That article focuses on hair rather than facial skincare, but it provides another look at how rice is commonly incorporated into DIY beauty routines.
Benefits of Oats for Skin
Oats are particularly interesting for skincare because they are known for their soothing and moisturizing properties.
Colloidal oatmeal, a finely milled form of oats specifically prepared for skin use, is commonly used in products designed for dry, sensitive, or irritated skin.
Oats contain compounds such as beta-glucan, which can help support the skin’s moisture barrier, while other oat components have soothing properties.
For a homemade mask, finely ground oats can provide a soft texture that is much gentler than using rough particles as a physical scrub.
That distinction matters.
You do not want to aggressively rub oat particles against your skin in an attempt to “scrub away” dark spots. Dark spots are not dirt sitting on the surface of your skin. Excessive rubbing can cause irritation, and irritation can potentially make pigmentation more noticeable.
The goal should be gentle application rather than aggressive exfoliation.
Why Rice and Oats Work Well Together
Rice and oats complement each other nicely in a simple homemade mask.
Rice can provide a smooth, soft base, while finely ground oats can add a creamy texture and soothing feel.
Together, they can create a mask that focuses more on comfort, softness, and a refreshed appearance than on aggressive treatment.
This makes a DIY rice and oat face mask a reasonable option for someone who enjoys simple DIY skincare and wants to add an occasional gentle mask to their routine.
Still, the mask should be only one part of your skincare approach.
If your main concern is dark spots, your routine should also focus on the things that can actually influence how pigmentation develops over time—especially sun protection, avoiding unnecessary skin irritation, and choosing evidence-based skincare when needed.
And if you enjoy experimenting with natural beauty ingredients, you can explore our other DIY guides, such as How to Use Aloe Vera for Hair Growth: The Ultimate 7-Day DIY Routine. Just remember that ingredients that are popular for hair care are not automatically appropriate for facial skin.
The biggest takeaway: rice and oats can make a simple, soothing DIY mask, but the value comes from using it gently and realistically—not expecting two kitchen ingredients to erase pigmentation overnight.
4. Rice & Oat Brightening Face Mask: Ingredients You’ll Need
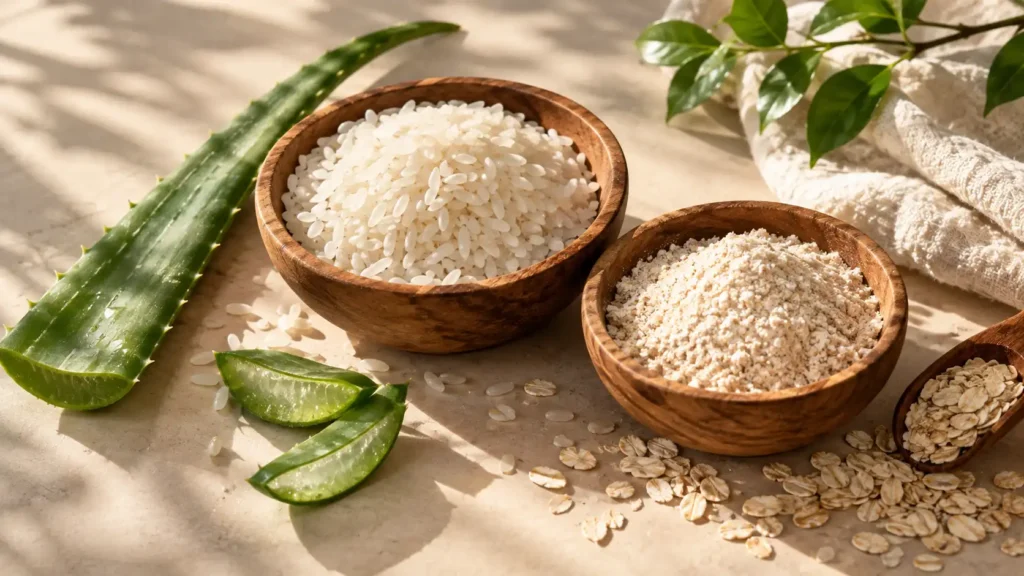
One of the best things about a DIY rice and oat face mask is how simple the ingredient list can be. You do not need a long list of expensive ingredients to make a basic homemade mask.
For this recipe, the goal is to create a smooth, gentle, easy-to-spread paste that leaves your skin feeling soft and refreshed without unnecessary irritation.
Rice
You will need 1 tablespoon of plain cooked white rice.
Cooked rice works well for this type of homemade mask because it becomes soft and easy to blend into a smooth paste. You can use regular white rice from your kitchen as long as it is plain and does not contain salt, spices, oil, or other seasonings.
There is no need to use a special or expensive type of rice. The important thing is that the rice is plain, fully cooked, and cooled before you use it.
If you already enjoy rice-based DIY beauty recipes, you may also want to check out our guide to The Best DIY Rice Water Toner for Flawless Glass Skin: My 7-Day Secret.
Oats
Add 1 tablespoon of plain, finely ground oats.
Choose plain oats without added sugar, flavoring, salt, or other ingredients. Finely ground oats are preferable because they create a smoother mask and reduce the need for rubbing your skin.
If your oats are not already finely ground, you can pulse them in a clean blender or food processor until they resemble a fine powder.
Do not use coarse oat pieces as a scrub. The purpose of this recipe is to make a gentle face mask, not to physically scrub away dark spots.
Water or Another Suitable Liquid
You will need approximately 1–2 tablespoons of lukewarm water, depending on the consistency of your mixture.
Start with a small amount and add more gradually. It is much easier to thin the mask than to fix a mixture that has become too watery.
You can also use plain, unsweetened milk if it works well with your skin, but plain water is the simplest option and is less likely to introduce unnecessary ingredients.
Optional Gentle Ingredient
If you want to make the mask a little more moisturizing, you can add ½ teaspoon of pure aloe vera gel.
If you choose aloe vera, use a product with a simple ingredient list and avoid fragranced gels.
Aloe vera is popular in DIY beauty routines because of its lightweight, soothing feel. However, adding more ingredients does not automatically make a face mask more effective. Keeping the recipe simple is often the better choice, especially if you have sensitive skin.
If you enjoy aloe-based DIY beauty recipes, you can read our related guide, How to Use Aloe Vera for Hair Growth: The Ultimate 7-Day DIY Routine. Keep in mind that the linked guide is for hair care, not facial pigmentation.
Exact Quantities at a Glance
For one fresh application, use:
- 1 tablespoon cooked plain white rice
- 1 tablespoon finely ground plain oats
- 1–2 tablespoons lukewarm water
- ½ teaspoon pure aloe vera gel (optional)
These quantities are enough for approximately one face application.
You do not need to make a large batch. Making a small amount helps you prepare the mask fresh and avoid keeping homemade mixtures around for too long.
5. How to Make the Rice & Oat Face Mask at Home
Once you have your ingredients ready, making this DIY rice and oat face mask takes only a few minutes.
The most important part is not rushing the process. You want the rice and oats to become smooth enough that the mask can be spread across your skin without aggressive rubbing.
Step 1: Prepare the Rice
Start with 1 tablespoon of plain cooked rice.
If you are cooking rice specifically for this mask, allow it to cool completely before using it. You do not want to apply hot or warm food directly to your face.
Place the cooled rice into a clean bowl.
If the rice contains oil, salt, spices, or other seasonings, do not use it for your face. Plain rice is the safest choice for this simple recipe.
You can also lightly mash the rice with a spoon before blending. This helps break down the larger pieces and makes the next step easier.
Step 2: Prepare the Oats
Measure 1 tablespoon of plain oats.
If you have whole or rolled oats, grind them into a fine powder using a clean blender, spice grinder, or food processor.
The final texture should be similar to a fine powder rather than coarse crumbs.
This step is important because large, rough oat particles can encourage you to rub the mask into your skin. There is no benefit in aggressively scrubbing dark spots.
A smoother mixture allows you to apply and remove the mask more gently.
Step 3: Blend the Ingredients
Add the cooked rice and finely ground oats to a clean blender or small food processor.
Add about 1 tablespoon of lukewarm water and blend.
Check the mixture after blending. If it is too thick or the rice is still chunky, add another ½ to 1 tablespoon of water and blend again.
If you are using aloe vera gel, add ½ teaspoon after the main ingredients have been blended and mix until everything is evenly combined.
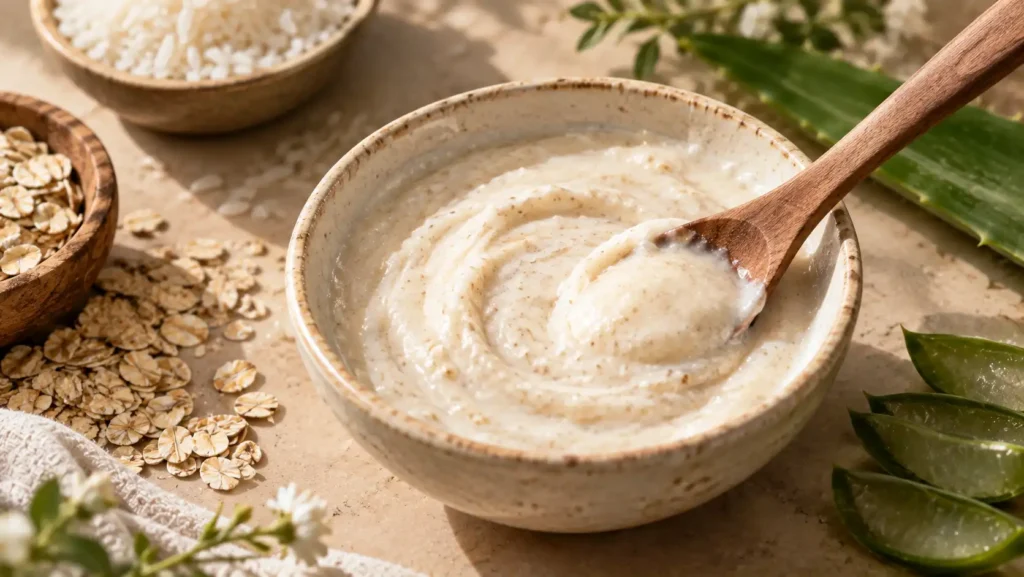
The finished mixture should look like a smooth, creamy paste without large rice pieces.
You can also make the mixture by hand if you do not have a blender, but blending usually produces a smoother texture that is easier to apply.
Step 4: Get the Right Mask Consistency
The consistency of your mask matters more than you might think.
A good DIY rice and oat face mask should be:
- Smooth
- Creamy
- Easy to spread
- Thick enough to stay on your skin
- Not dry or crumbly
- Not watery or runny
If the mixture is too thick, add a few drops of water and mix again.
If it is too thin, add a small amount of finely ground oats until it reaches a comfortable consistency.
You should be able to spread a thin, even layer over your skin without needing to press or rub it into the face.
Step 5: Prepare It Fresh
Because this is a homemade mixture made with cooked food and water, the simplest approach is to prepare it fresh each time you want to use it.
There is no need to make a large jar and keep it for several days.
Fresh preparation also gives you better control over the texture. As the mixture sits, the oats and rice can absorb more liquid and change the consistency.
For the best DIY experience, make only enough for one application, use it, and discard whatever remains.
This is similar to the simple approach used in many homemade beauty routines: fewer ingredients, smaller batches, and less unnecessary storage.
6. How to Apply the Mask Correctly
Making a good mask is only half the process. How you apply and remove your DIY rice and oat face mask matters just as much.
If you are trying to improve the appearance of dark spots, avoid the common mistake of thinking that rubbing the mask harder will make it work faster.
Gentle application is the better approach.
Cleanse Your Face First
Start with a clean face.
Use your usual gentle facial cleanser to remove sunscreen, makeup, excess oil, sweat, and dirt from the surface of your skin.
Rinse with lukewarm water and gently pat your face dry with a clean towel.
You do not need to exfoliate your skin before applying the mask. In fact, combining several exfoliating or irritating steps at once can leave your skin feeling uncomfortable.
If your skin is already irritated, red, peeling, or burning, it is better to skip the mask until your skin feels normal again.
Apply a Thin, Even Layer
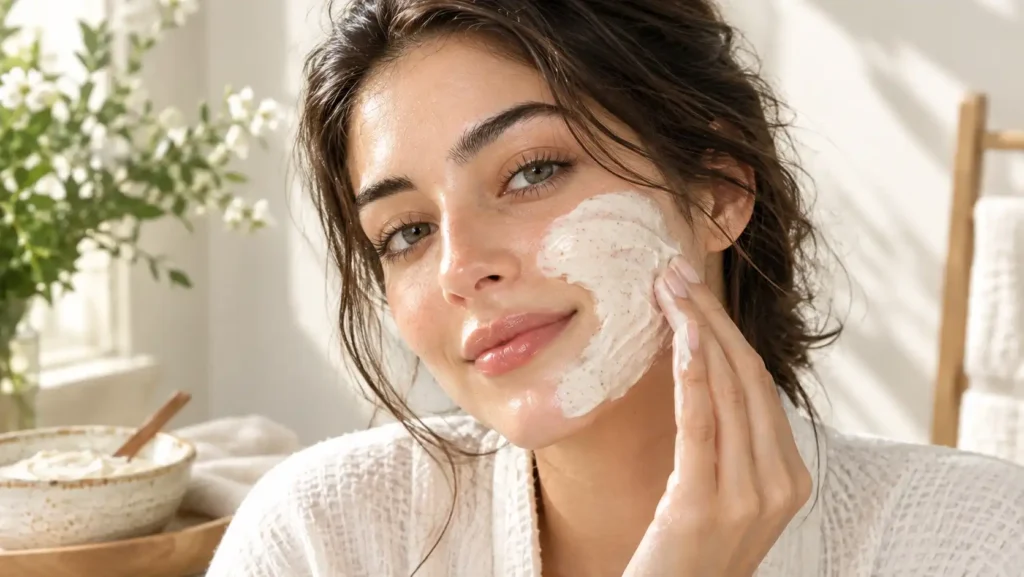
Take a small amount of the prepared mask and gently spread it over your face using clean fingertips.
Apply a thin, even layer rather than putting on a thick coating.
You do not need to massage the mixture into your skin.
Simply spread it across the areas where you want to use it and leave it undisturbed.
If you have a few areas of pigmentation, you can apply the mask evenly to the face rather than repeatedly rubbing the darker areas.
Dark spots are not surface dirt, so scrubbing them harder will not make them disappear faster.
Avoid the Eyes and Lips
Be careful around sensitive areas.
Avoid applying the mask directly around:
- Eyes
- Eyelids
- Lips
- Corners of the nose
- Any cuts or broken skin
The skin around the eyes is particularly delicate, and there is no reason to risk getting a homemade mixture into your eyes.
If the mask accidentally gets into your eyes, rinse thoroughly with clean water.
How Long Should You Leave It On?
For your first use, keep the mask on for around 10 minutes.
You do not need to wait until the mask becomes completely dry and tight.
A common DIY skincare mistake is assuming that longer contact time means better results. It does not.
If your skin feels uncomfortable, itchy, burning, or unusually tight while the mask is on, rinse it off immediately.
For subsequent uses, you can still keep the application around 10–15 minutes. There is no need to leave a homemade rice and oat mask on overnight.
How to Remove It Without Irritating Your Skin
This is one of the most important parts of the entire routine.
When it is time to remove the mask, do not scrub your face.
Instead, splash your face gently with lukewarm water and allow the mask to soften.
Once it has loosened, use your fingertips to rinse it away with very light movements.
If some of the mixture has dried, add more water and give it a little time to soften rather than rubbing harder.
After rinsing, gently pat your face dry with a clean, soft towel.
Finish with your usual gentle moisturizer to help keep your skin comfortable.
If you are using the mask during the daytime, finish your skincare routine with broad-spectrum sunscreen. Sun protection is especially important if your goal is to improve the appearance of dark spots and uneven skin tone.
For another rice-based skincare idea, you can also explore The Best DIY Rice Water Toner for Flawless Glass Skin: My 7-Day Secret.
7. How Often Should You Use a Rice & Oat Face Mask?
When it comes to a DIY rice and oat face mask, using it more often does not necessarily mean getting better or faster results.
Your skin needs time to recover between skincare treatments, especially if you have sensitive, dry, or acne-prone skin. A simple routine with consistent care is usually easier for your skin to tolerate than using a homemade mask every day.
How often you use the mask can depend on your skin type, how your skin reacts, and what other products you are using.
Normal Skin
If your skin is generally balanced and does not react easily to new products, you can start with the mask once or twice a week.
There is no need to use it every day. A weekly or twice-weekly mask can be enough to add a simple self-care step to your routine without overdoing it.
Pay attention to how your skin feels afterward. If your skin remains comfortable, soft, and normal-looking, you can continue with the same schedule.
If you notice dryness, redness, itching, or tightness, reduce the frequency or stop using the mask.
Dry or Sensitive Skin
If you have dry or sensitive skin, start more slowly.
Try using the DIY rice and oat face mask once a week and see how your skin responds.
Sensitive skin can react more easily to changes in products and routines, even when the ingredients themselves seem gentle. This is why it is better to start with a small amount and avoid adding multiple ingredients to the recipe.
You should also avoid rubbing the mask into your skin while applying or removing it.
If your skin is currently irritated, peeling, sunburned, or unusually dry, skip the mask until your skin barrier feels comfortable again.
For people who prefer simple, soothing DIY beauty routines, keeping the recipe basic is often a better approach than trying to create a complicated “super mask.”
Oily or Acne-Prone Skin
If you have oily or acne-prone skin, you may be tempted to use a face mask frequently to control oil or make your skin feel cleaner.
But more frequent use is not automatically better.
Start with once or twice a week and see how your skin responds.
Also remember that a rice and oat mask is not an acne treatment. If you have active acne, the most important thing is to avoid picking, squeezing, or aggressively scrubbing your skin.
Repeated irritation can leave behind darker marks after breakouts.
If your skin is acne-prone, keep the mask simple and avoid adding ingredients such as lemon juice, baking soda, strong essential oils, or harsh exfoliants.
Why Using It More Often Isn’t Necessarily Better
It can be tempting to think, “If one use makes my skin feel good, using it every day must work even better.”
That is not how skincare usually works.
Using a homemade mask too frequently can contribute to dryness, irritation, or sensitivity, especially if you are also using exfoliating acids, retinoids, acne treatments, or other active skincare products.
And when skin becomes irritated, dark spots may become more noticeable or take longer to improve.
The goal is not to use the DIY rice and oat face mask as often as possible. The goal is to use it gently as one small part of a balanced skincare routine.
Start low, watch how your skin responds, and adjust accordingly.
8. What Results Can You Expect?
If you are using a DIY rice and oat face mask for dark spots, it is important to separate the immediate feel of your skin from long-term changes in pigmentation.
A homemade mask may make your skin feel softer after one use, but dark spots usually do not disappear overnight.
The exact results can vary depending on what caused the pigmentation, how long you have had it, your sun exposure, and the rest of your skincare routine.
After the First Few Uses
After the first few applications, the most noticeable changes may be related to how your skin feels rather than the color of a dark spot.
Your skin may feel:
- Softer
- Smoother
- More hydrated
- Fresh and refreshed
- Temporarily brighter-looking
You may also notice that your skin looks more polished because the surface feels smoother.
However, do not expect a stubborn brown mark to suddenly disappear after one or two applications.
If the mask makes your skin look brighter, that is a nice benefit—but temporary radiance is not the same as removing pigmentation.
After Several Weeks
With occasional, consistent use, you may continue to notice that your skin feels smoother and looks more refreshed.
However, if your main concern is a specific dark spot, several weeks of using a homemade mask may not produce a dramatic change.
Dark spots can take time to fade naturally, and some types of pigmentation need targeted skincare.
This is why your overall routine matters.
Try to focus on the basics:
Gentle cleansing + moisturizer + daily sunscreen + avoiding unnecessary irritation
These habits can be much more important for maintaining an even-looking complexion than simply adding more face-mask sessions.
If you enjoy rice-based beauty routines, you may also like The Best DIY Rice Water Toner for Flawless Glass Skin: My 7-Day Secret. That recipe focuses on rice water for skincare rather than this rice-and-oat mask.
When Dark Spots May Need More Than a DIY Mask
A homemade mask may not be enough if your pigmentation is deep, persistent, spreading, or repeatedly returning.
For example, dark spots associated with hormonal pigmentation, significant sun damage, or persistent acne may need a more targeted approach.
You may want to consider talking with a dermatologist if:
- A dark spot keeps getting darker
- Pigmentation continues to spread
- You have large or persistent patches
- Your skin becomes painful, itchy, or inflamed
- You have tried a gentle routine for a reasonable amount of time without improvement
- You are unsure what is causing the pigmentation
A dermatologist can help determine whether you are dealing with post-acne marks, sun-related pigmentation, melasma, or another skin concern.
The most important thing is not to keep adding stronger DIY ingredients simply because the first approach did not work.
9. How to Make the Mask Safer for Sensitive Skin
Even a simple DIY rice and oat face mask should be introduced carefully, particularly if your skin tends to react easily.
“Natural” does not automatically mean “risk-free.” Your skin can still react to a natural ingredient, and homemade mixtures do not go through the same testing and preservation process as formulated skincare products.
A few simple precautions can make the experience much safer.
Patch Testing
Before applying the mask to your entire face, consider doing a small patch test.
Apply a small amount of the finished mixture to a discreet area of skin, such as the inner arm or another small area.
Wait and see how your skin responds.
If you experience burning, significant redness, itching, swelling, or irritation, wash the area and do not use the mask on your face.
A patch test cannot guarantee that you will never react to a product, but it can help you identify obvious sensitivity before applying something over a larger area.
Avoiding Harsh Scrubbing
This is especially important if you are using the mask because of dark spots.
Do not treat the rice and oat mixture like a facial scrub.
When you apply it, spread it gently across the skin without rubbing aggressively.
The same applies when removing it. Soften the mask with lukewarm water and rinse gently instead of trying to scrub off every last bit.
Aggressive rubbing can irritate the skin, and repeated irritation is not helpful when your goal is a more even-looking complexion.
Avoiding Irritating Combinations
One of the easiest ways to make a simple DIY mask unnecessarily harsh is by adding too many ingredients.
Avoid turning your rice and oat mask into a mixture containing several strong or potentially irritating ingredients.
In particular, be cautious about DIY combinations involving:
- Lemon juice
- Baking soda
- Undiluted essential oils
- Strong acids
- Harsh physical scrubs
- Fragranced ingredients
You do not need a dozen ingredients to make a useful homemade mask.
For most people, rice + finely ground oats + water is enough for a basic recipe.
If you want additional soothing moisture, a small amount of simple aloe vera gel can be considered, but always introduce new ingredients carefully.
When to Stop Using It
Listen to your skin.
Stop using the mask if you notice:
- Burning
- Persistent redness
- Swelling
- Itching
- Rash
- Increasing dryness
- Peeling or significant irritation
A little temporary tightness after a mask is not a reason to push through discomfort.
If your skin reacts badly, rinse the mask off with lukewarm water and return to a simple, gentle skincare routine.
If the reaction is severe or does not improve, seek medical advice.
A face mask should never leave your skin feeling damaged just because you want faster brightening results.
10. Common Mistakes That Can Make Dark Spots Worse
Using a DIY rice and oat face mask is fairly simple, but small mistakes can turn a gentle skincare step into an irritating one.
When you’re trying to fade dark spots, the goal should be to reduce unnecessary irritation and protect your skin, not constantly attack the pigmentation.
Here are some of the most common mistakes to avoid.
Scrubbing Aggressively
This is probably one of the biggest mistakes people make with homemade face masks.
You may think that rubbing rice or oats against a dark spot will “scrub away” the pigmentation.
It won’t.
Dark spots are caused by changes in pigment within the skin. They are not dirt sitting on the surface.
Aggressive scrubbing can irritate your skin, and ongoing irritation can make pigmentation harder to manage.
Apply the mask gently and rinse it off without rubbing.
Leaving the Mask on Too Long
Another common mistake is believing that leaving a mask on for an hour—or even overnight—will produce better results.
There is no need to do this.
For this DIY rice and oat face mask, around 10–15 minutes is plenty.
Once the mask has done its job, rinse it off gently.
If the mask becomes extremely dry or uncomfortable, you can remove it earlier.
More time does not automatically mean better skincare.
Using Too Many DIY Ingredients
Social media DIY recipes can make it tempting to add anything that is said to “brighten” skin.
Lemon, baking soda, vinegar, essential oils, sugar, and other kitchen ingredients are sometimes mixed together in homemade recipes.
More ingredients do not necessarily mean more benefits.
In fact, combining multiple potentially irritating ingredients can make it much harder to know what caused a reaction.
Keep your DIY rice and oat face mask simple.
A short ingredient list makes it easier to understand what you are putting on your skin and easier to stop using something if your skin does not like it.
Applying It to Irritated or Broken Skin
Do not apply a homemade mask to skin that is:
- Cut or broken
- Sunburned
- Peeling
- Actively irritated
- Very inflamed
- Freshly picked or squeezed from acne
When the skin barrier is already compromised, even normally gentle ingredients may feel irritating.
Wait until your skin has recovered before introducing the mask.
This is particularly important if you have recently used strong exfoliants, retinoids, or acne treatments that have left your skin sensitive.
Skipping Sunscreen
You can make the mask perfectly, use it gently, and still feel disappointed if you skip sun protection.
UV exposure can encourage your skin to produce more melanin and can make existing pigmentation more noticeable.
If dark spots are your main concern, daily broad-spectrum sunscreen should be a regular part of your routine.
Think of the mask as an optional supportive step. Sunscreen is the protection that helps prevent your efforts from being undermined by continued UV exposure.
And if you are interested in other DIY beauty routines on our site, you can explore The Ultimate DIY Rice Water Recipe for Extreme Hair Growth or How to Make Rosemary Water for Hair Growth. Those articles focus on hair care, while this face mask is specifically intended as a gentle facial skincare recipe.
The simple rule is: don’t try to force dark spots away. Treat your skin gently, stay consistent, and protect it from the sun.
11. Sunscreen Is More Important Than Any DIY Brightening Mask
If dark spots are your main skincare concern, there is one step that deserves more attention than any homemade brightening treatment: daily sun protection.
You can use a DIY rice and oat face mask as part of a gentle skincare routine, but leaving your skin unprotected from UV radiation can make it much harder to maintain an even-looking complexion.
Think of sunscreen as the foundation of your pigmentation routine. A face mask may be an optional extra, while sun protection helps reduce ongoing UV exposure that can contribute to pigmentation.
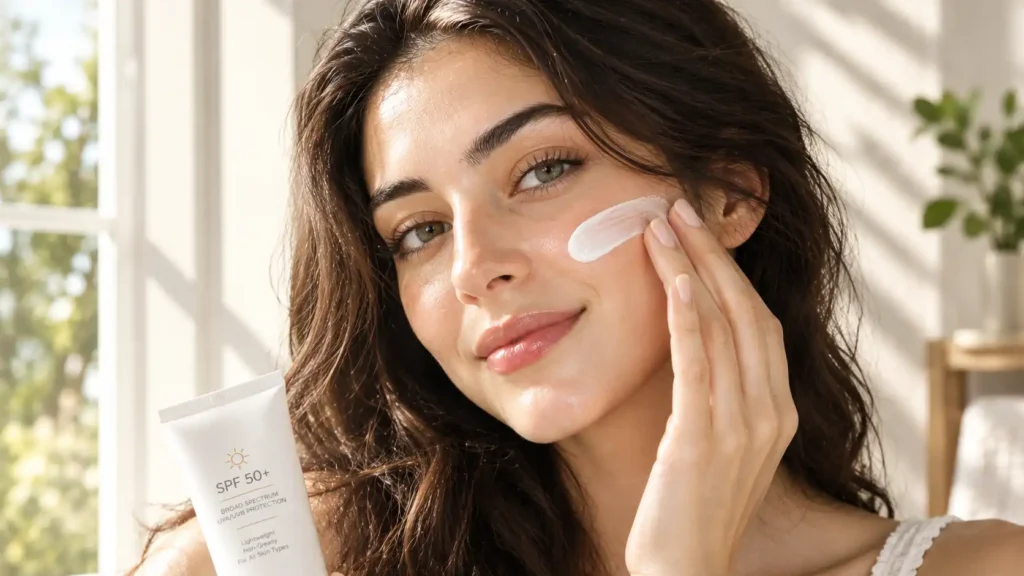
Why UV Exposure Can Darken Existing Spots
Your skin naturally produces melanin, the pigment responsible for your skin color. UV radiation can stimulate melanin production as your skin responds to sun exposure.
If you already have acne marks or areas of hyperpigmentation, frequent sun exposure can make them appear darker or more noticeable.
This is one reason pigmentation can feel frustrating. You may be doing everything else consistently, but regular unprotected sun exposure can continue working against your efforts.
You do not have to completely avoid the outdoors. The goal is to protect your skin while enjoying normal daily activities.
Using sunscreen consistently is especially important when spending time outside, driving, walking, exercising outdoors, or sitting near windows with significant sun exposure.
SPF and Daily Application
For daily facial skincare, choose a broad-spectrum sunscreen with SPF 30 or higher.
“Broad-spectrum” is important because it means the sunscreen is designed to protect against both UVA and UVB radiation.
Apply sunscreen as the last step of your morning skincare routine, after moisturizer if you use one.
One of the most common mistakes is applying only a tiny amount because sunscreen can feel heavy or greasy. Follow the application directions on your specific sunscreen and make sure you cover commonly missed areas such as the face, ears, hairline, and neck when appropriate.
If you are using a DIY rice and oat face mask during the daytime, the mask does not replace sunscreen. After rinsing and completing your skincare routine, apply sunscreen before going outside.
Reapplication When You’re Outdoors
One application in the morning may not be enough if you are spending a long time outdoors.
Sunscreen can wear away because of sweating, swimming, wiping your face, or normal outdoor activity.
When you are outdoors for an extended period, follow your sunscreen’s instructions for reapplication. Many sunscreens recommend reapplying approximately every two hours, and sooner after swimming or heavy sweating.
You can also combine sunscreen with other forms of sun protection, such as:
- A wide-brimmed hat
- Sunglasses
- Shade
- Protective clothing
- Avoiding prolonged direct sun when possible
These habits can be especially helpful if you are actively trying to improve the appearance of pigmentation.
Why Treating Pigmentation Without Sun Protection Can Be Frustrating
Imagine spending several weeks following a skincare routine, using a DIY rice and oat face mask, moisturizing regularly, and trying to take better care of your skin—while spending hours in the sun without protection.
You may not see the improvement you hoped for.
That does not necessarily mean your skincare routine “failed.” It may simply mean that new or existing pigmentation is still being influenced by UV exposure.
This is why it makes sense to prioritize sun protection before adding more and more brightening products.
A simple routine can look like:
Gentle cleanser → moisturizer → sunscreen in the morning
Then, if you enjoy DIY skincare, you can use your rice and oat mask occasionally as an optional addition.
If you enjoy rice-based skincare, you may also want to read The Best DIY Rice Water Toner for Flawless Glass Skin: My 7-Day Secret. Just remember that a rice-water toner and a sunscreen serve very different purposes in a skincare routine.
12. Rice & Oat Mask vs. Proven Ingredients for Dark Spots
A DIY rice and oat face mask can be an enjoyable and simple addition to a skincare routine, but it is important to understand how it compares with ingredients that have been more specifically studied for pigmentation and uneven skin tone.
Not every skincare ingredient has the same purpose.
Some ingredients mainly help support the skin barrier or improve how the skin feels, while others are used specifically in routines targeting discoloration.
Here is a simple comparison.
| Option | Main Role | What You Can Realistically Expect |
|---|---|---|
| DIY rice & oat mask | Gentle, soothing skincare | May leave skin feeling softer and looking refreshed; evidence for directly fading dark spots is limited |
| Niacinamide | Supports skin barrier and helps improve uneven-looking tone | Can be useful for overall skin tone and pigmentation as part of a consistent routine |
| Vitamin C | Antioxidant skincare | Can help brighten the appearance of skin and support protection from environmental stressors |
| Azelaic acid | Targeted skincare for acne and pigmentation | Can be helpful for certain types of dark marks and acne-related discoloration |
| Retinoids | Increase skin cell turnover and support treatment of several skin concerns | Can help improve uneven tone and pigmentation over time but may cause irritation if introduced too quickly |
| Sunscreen | Protects skin from UV radiation | Helps prevent UV-related pigmentation from becoming worse and supports other pigmentation treatments |
DIY Rice & Oat Face Mask
The biggest advantage of a DIY rice and oat face mask is simplicity.
Rice and oats are inexpensive and easy to find, and the finished mask can provide a pleasant, softening skincare experience.
However, there is a difference between feeling smoother after a mask and treating the biological process responsible for pigmentation.
There is limited evidence that a homemade rice-and-oat mixture can directly and reliably fade established dark spots.
That does not mean you cannot use it. It simply means you should view it as an optional gentle skincare step rather than a proven pigmentation treatment.
Niacinamide
Niacinamide, also known as vitamin B3, is widely used in skincare.
It can help support the skin barrier and is commonly included in products designed for uneven skin tone, excess oil, and overall skin health.
Unlike a homemade mask, niacinamide is available in standardized skincare formulations, making it easier to control the concentration and formulation.
If your main goal is improving the appearance of uneven pigmentation, a properly formulated niacinamide product may be more predictable than relying only on a DIY mask.
Vitamin C
Vitamin C is an antioxidant commonly used in morning skincare routines.
It can help support the skin against oxidative stress and is often used to improve the appearance of dullness and uneven skin tone.
Vitamin C products vary considerably in formulation and stability, so not every vitamin C product will perform the same way.
If you are new to active skincare, introducing one product at a time makes it easier to understand how your skin responds.
Azelaic Acid
Azelaic acid is another ingredient worth knowing if you are dealing with acne, post-acne marks, or uneven pigmentation.
It is used in skincare and dermatology for several concerns and may be particularly useful when acne and pigmentation occur together.
Because it is an active ingredient, it can still cause irritation in some people, especially when introduced too quickly.
If you already use other active ingredients, it is worth keeping your routine simple rather than layering several treatments at once.
Retinoids
Retinoids are vitamin A-derived ingredients used for a variety of skin concerns, including acne, texture, and uneven pigmentation.
They work very differently from a DIY rice and oat face mask and have much stronger evidence behind their use for several dermatological concerns.
However, retinoids can also cause dryness, irritation, peeling, and increased sensitivity when used incorrectly.
If you decide to use a retinoid, introduce it gradually and follow the directions for the specific product. If you are pregnant or trying to become pregnant, talk with a healthcare professional before using retinoid products.
Sunscreen
Sunscreen is different from all of the other options because its primary job is protection rather than treating an existing dark spot.
But when pigmentation is your concern, that protective role is extremely important.
A brightening ingredient can be part of your routine, but daily broad-spectrum sunscreen helps reduce ongoing UV exposure that can contribute to pigmentation.
This is why the most practical approach is not necessarily choosing one ingredient over another.
A routine might include sunscreen as the foundation, a gentle moisturizer for barrier support, and a targeted active ingredient if appropriate for your skin.
The DIY rice and oat face mask can remain an occasional, optional addition if your skin tolerates it.
13. Who Should Avoid This DIY Face Mask?
A homemade DIY rice and oat face mask may be simple, but that does not mean everyone should use it.
Your skin condition matters more than the fact that the ingredients are commonly found in the kitchen.
If your skin is currently irritated or damaged, adding a new DIY treatment may make things worse.
Very Sensitive or Reactive Skin
If your skin frequently reacts to new skincare products, start with extra caution.
Even simple ingredients can cause irritation or an allergic reaction in some people.
If you have very sensitive skin, consider doing a patch test before applying the mask to your entire face.
You may also prefer a commercially formulated product designed specifically for sensitive skin because it has more controlled ingredients and formulation.
Active Skin Irritation
Do not use the mask on skin that is currently:
- Burning
- Very red
- Peeling
- Severely dry
- Inflamed
- Itchy or irritated
When your skin barrier is already struggling, the best approach is usually to simplify your routine.
Give your skin time to recover before experimenting with another homemade treatment.
Open Wounds
Never apply the mask to cuts, open wounds, scraped skin, or freshly damaged areas.
The mixture is not designed to disinfect or treat wounds.
If you have recently picked a pimple and broken the skin, wait until the area has healed rather than applying a face mask directly over it.
This is especially important because unnecessary irritation around acne can contribute to post-inflammatory discoloration.
Certain Active Skin Conditions
If you have an ongoing skin condition such as eczema, dermatitis, rosacea, or another condition that makes your skin highly reactive, be cautious with DIY treatments.
The safest choice may be to follow the skincare routine recommended by your healthcare professional rather than experimenting with homemade recipes.
This does not mean that rice or oats are automatically harmful. It simply means that your individual skin condition should take priority over a DIY skincare trend.
When Professional Advice Is More Appropriate
Sometimes a dark spot is not simply a harmless post-acne mark.
Consider speaking with a dermatologist or other qualified healthcare professional if you have pigmentation that:
- Appears suddenly without an obvious reason
- Keeps changing or becoming darker
- Continues spreading
- Is associated with pain, itching, bleeding, or other unusual symptoms
- Does not improve despite a consistent, gentle skincare routine
- You are unsure what type of pigmentation you have
A professional can help identify whether you are dealing with post-inflammatory hyperpigmentation, melasma, sun-related pigmentation, acne-related marks, or another skin concern.
That can save you from trying one DIY recipe after another without knowing what you are actually treating.
The Bottom Line
A DIY rice and oat face mask can be a simple addition to a gentle skincare routine if your skin tolerates it.
But it should not replace daily sunscreen, basic skin-barrier care, or professional treatment when you need it.
The goal is not to use the strongest treatment possible. The goal is to choose an approach that is gentle, consistent, and appropriate for your skin.
14. How to Store Leftover Rice & Oat Mask
When you make a DIY rice and oat face mask, it is best to prepare only the amount you need for one application. Because this mask contains cooked rice and oats without commercial preservatives, it can spoil more quickly than a store-bought skincare product. Fresh preparation also gives you the best texture and makes it easier to avoid unwanted bacteria or changes in the ingredients.
If you do have some mask left over, proper storage is important. Do not leave the mixture sitting at room temperature for hours, especially in a warm or humid environment. Instead, follow a few simple storage steps to keep the leftover mask as clean and fresh as possible.
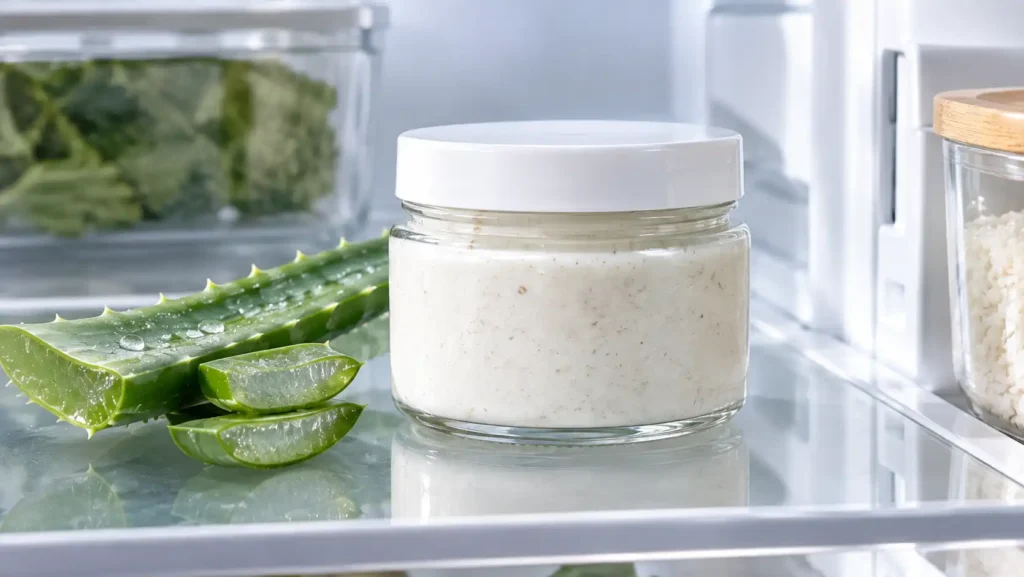
Fresh Preparation vs. Storage
Freshly prepared rice and oat mask is always the preferred option. When you make the mask immediately before applying it, you know exactly when the ingredients were prepared, and you can use it while the texture is smooth and fresh.
Cooked rice and oats contain moisture, which creates an environment where microorganisms can grow if the mixture is left out for too long. This is one reason why making a small batch is better than preparing a large amount for several days.
If you accidentally make more than you need, transfer the unused portion to a clean, airtight container rather than putting the applicator, spoon, or fingers back into the container after touching your skin.
For the best skincare routine, try to make enough DIY rice and oat face mask for one use whenever possible. It takes a little more preparation, but it also reduces the need to store homemade skincare.
If you enjoy DIY rice-based skincare, you may also like my guide on The Best DIY Rice Water Toner for Flawless Glass Skin: My 7-Day Secret, which covers another simple way to use rice in a skincare routine.
Refrigeration Considerations
If you need to save leftover mask, refrigerate it promptly in a clean, tightly sealed container. Keeping the mixture cold can slow down microbial growth, but refrigeration does not make a homemade mask safe to keep indefinitely.
Before storing it, make sure the container is clean and dry. A small glass or food-safe airtight container works well. Avoid repeatedly opening the same container throughout the day because every opening can introduce air, moisture, or contaminants.
It is also better to avoid adding fresh ingredients such as milk, yogurt, fruit juice, or other perishable ingredients if you already plan to store the mask. These additions can make a homemade mixture more difficult to store safely.
When in doubt, make a fresh batch. Homemade skincare does not contain the preservatives used in many commercial products, so it is not worth keeping a questionable mixture simply to avoid wasting a small amount of rice and oats.
You should also avoid storing a mask that has already been in direct contact with your face, used with your fingers, or contaminated by a used applicator. Once the mask has been applied to your skin, do not put the leftover product back into the storage container.
Signs That Your Rice and Oat Mask Should Be Discarded
Before using stored DIY rice and oat face mask, check its appearance, smell, and texture. If anything seems unusual, throw it away rather than applying it to your face.
Here are some common warning signs:
- A sour, fermented, or unpleasant smell that was not present when you first made the mask.
- A noticeable color change, especially if the mixture looks darker, yellowed, grayish, or otherwise different from its original appearance.
- Mold or fuzzy spots on the surface or around the container.
- Unexpected bubbles or signs of fermentation.
- A slimy or unusually sticky texture that is different from the original consistency.
- Separation combined with an unusual smell, color, or texture.
- Any visible contamination from food particles, dirty utensils, or repeated finger contact.
Remember that not all spoilage is visible. A mask can potentially contain unwanted microorganisms even when it still looks normal. So if you are unsure how long it has been stored or whether it was handled hygienically, the safest choice is to discard it and prepare a fresh mask.
Never try to rescue a questionable homemade face mask by adding more water, blending it again, or removing a visible spot. If you suspect spoilage, it is better to throw the entire mixture away.
A Simple Storage Rule to Remember
The easiest approach is: make fresh, use fresh, and store only when necessary.
For a homemade DIY rice and oat face mask, preparing a small single-use portion is usually the simplest way to maintain good hygiene. If you have leftovers, refrigerate them promptly in a clean airtight container and check carefully for any changes before using them again.
And if the mask smells different, looks different, feels different, or you simply cannot remember when you made it, do not use it on your face. A fresh batch takes only a few minutes to prepare and is a much better choice than risking skin irritation from an old homemade mixture.
15. Frequently Asked Questions
If you are trying a DIY rice and oat face mask for the first time, you may have questions about dark spots, acne marks, sensitive skin, frequency, and how quickly you can expect results. Here are the most common questions answered in simple terms.
Can rice and oats remove dark spots permanently?
No, rice and oats cannot permanently remove dark spots on their own. A homemade rice and oat face mask may help your skin look smoother, softer, and more refreshed, but it should not be treated as a permanent dark-spot treatment.
Dark spots can develop for many reasons, including sun exposure, acne, inflammation, hormonal changes, and skin irritation. Even when a spot fades, continued UV exposure can cause pigmentation to become darker again.
The biggest benefit of using a DIY rice and oat face mask is that it can be part of a gentle skincare routine that supports a more even-looking complexion. However, consistency matters more than expecting one ingredient to erase pigmentation overnight.
Daily sun protection is especially important if your goal is to improve the appearance of dark spots. Without sunscreen, UV exposure can continue to trigger or deepen pigmentation.
For another rice-based skincare idea, you can also check out The Best DIY Rice Water Toner for Flawless Glass Skin: My 7-Day Secret.
Can I use this mask every day?
It is generally better not to use a DIY rice and oat face mask every day.
Even gentle ingredients can become irritating when used too frequently, especially if you are rubbing the mask onto your skin during application or removal. Your skin needs time between treatments to maintain its natural barrier.
For most people, starting with 1–2 times per week is a more practical approach. If your skin tolerates it well, you can adjust your routine based on how your skin feels.
Pay attention to signs such as dryness, tightness, redness, burning, or increased sensitivity. If any of these appear, stop using the mask until your skin feels comfortable again.
With skincare, more is not always better. A simple routine used consistently is often easier for your skin to tolerate than using multiple DIY treatments every day.
Can I use it for acne marks?
Yes, you can use a DIY rice and oat face mask as a gentle addition to a routine for skin with acne marks, but it is important to understand what it can and cannot do.
After acne heals, it can leave behind flat dark or red marks. These marks can gradually become less noticeable over time, although the process can take weeks or months.
Rice and oats may make the skin feel softer and smoother, but this mask should not be considered a proven treatment for acne or significant post-acne pigmentation.
If you currently have active acne, avoid aggressively scrubbing the mask into your skin. Friction can make irritated or inflamed skin feel worse. Apply it gently and rinse without rubbing.
If your main concern is persistent acne marks, a consistent skincare routine with appropriate sun protection is more important than relying on a single homemade mask.
Is it suitable for sensitive skin?
A DIY rice and oat face mask may be suitable for some people with sensitive skin, but natural ingredients are not automatically irritation-free.
Sensitive skin can react to new products and ingredients, so it is smart to patch test before applying the mask to your entire face. Apply a small amount to a limited area of skin and wait to see how your skin responds.
Keep the recipe simple if your skin is easily irritated. Avoid adding strong or potentially irritating ingredients such as lemon juice, baking soda, essential oils, or harsh scrubs.
When applying the mask, do not aggressively massage or exfoliate your skin. Gentle application is especially important when your skin barrier is sensitive.
If you experience burning, swelling, intense itching, or persistent redness, rinse the mask off and discontinue use.
Can I use rice flour instead of cooked rice?
Yes, rice flour can be used as an alternative to cooked rice, but the texture and feel of the mask will be different.
Cooked rice creates a softer, more creamy base when blended, while rice flour can produce a thicker or more powdery texture. Depending on how finely the flour is milled, it may also feel more abrasive when rubbed against the skin.
If you choose rice flour, do not scrub your face aggressively. Mix it into a smooth paste and apply it gently.
For a soothing DIY mask, the goal should be comfort rather than aggressive exfoliation. If the mixture feels rough against your skin, add enough liquid to create a smoother consistency or choose the cooked-rice version instead.
Should I wash my face before applying it?
Yes, it is a good idea to cleanse your face before applying a DIY rice and oat face mask.
Washing your face first helps remove makeup, sunscreen, excess oil, sweat, and everyday buildup from the skin’s surface. This also gives you a clean base for applying the mask.
Use a gentle cleanser and lukewarm water rather than a harsh scrub. You do not need to exfoliate your skin immediately before using the mask.
After cleansing, gently pat your face dry with a clean towel and apply the mask to clean skin.
Once you rinse the mask off, follow with a simple moisturizer to help keep your skin comfortable and hydrated.
Can I use the mask overnight?
No, it is better not to leave a homemade DIY rice and oat face mask on overnight.
This type of mask is designed to be a short-contact skincare treatment rather than an overnight product. Leaving a wet homemade mixture on your skin for many hours may increase the chance of dryness, irritation, discomfort, or contamination, particularly if the mixture begins to dry and crack.
Instead, apply the mask for the recommended amount of time in your recipe and then rinse it off gently with lukewarm water.
You do not need to keep a mask on longer to make it more effective. Longer contact does not automatically mean better results.
After rinsing, apply a gentle moisturizer. If you are using the mask during the daytime, finish your routine with sunscreen.
How long does it take to see results?
The answer depends on what you mean by results.
You may notice that your skin feels softer, smoother, or more hydrated after the first few uses. However, changes in the appearance of dark spots or uneven skin tone usually take much longer.
Pigmentation does not typically disappear in a few days, and individual results can vary based on factors such as skin type, the cause of the pigmentation, sun exposure, acne, and your overall skincare routine.
Instead of expecting dramatic results after one application, focus on using the mask consistently and gently.
Take progress photos in the same lighting every few weeks if you want to compare changes more accurately. Looking at your skin from day to day can make small changes difficult to notice.
Most importantly, do not keep increasing the frequency simply because you want faster results. Irritated skin can become more uneven-looking, which can work against your skincare goals.
Do I still need sunscreen after using the mask?
Absolutely. Using a DIY rice and oat face mask does not replace sunscreen.
If you are trying to improve the appearance of dark spots, uneven skin tone, or acne marks, protecting your skin from UV exposure is one of the most important parts of your routine.
Apply a broad-spectrum sunscreen during the daytime, especially when you will be spending time outdoors. Reapply as needed based on your sun exposure and the sunscreen’s directions.
Think of your routine this way: the DIY rice and oat face mask can be a gentle self-care step, while sunscreen helps protect your skin from the environmental exposure that can contribute to visible pigmentation.
Skipping sunscreen while trying to fade dark spots can make it harder to maintain an even-looking complexion.
If you enjoy DIY rice-based beauty routines, you may also want to explore The Ultimate DIY Rice Water Recipe for Extreme Hair Growth (Tested Secrets!) for a hair-care use of rice water.
16. Final Thoughts: Keep Your Brightening Routine Gentle and Consistent
A brighter-looking complexion does not have to come from a complicated 10-step routine. Sometimes, the best approach is to keep your skincare simple, gentle, and consistent. A DIY rice and oat face mask can be a relaxing addition to your routine when you use it with realistic expectations and pay attention to how your skin responds.
Rice and oats can make a homemade mask feel soft, comforting, and refreshing, but no DIY ingredient can transform your skin overnight. If you are dealing with dark spots, uneven tone, or acne marks, give your skin time. Consistency matters much more than using a mask every day or trying to get faster results.
Start by using the mask occasionally rather than overdoing it. Once or twice a week can be enough for a simple self-care routine, especially if you are new to homemade skincare. Always apply it gently, avoid harsh scrubbing, and stop if your skin becomes irritated.
It is also important to remember that brightening your skin does not mean trying to change your natural skin tone. The goal can simply be to support a more even-looking, healthy, and comfortable complexion while taking care of your skin barrier.
Don’t Forget the Basics
A homemade mask is only one small part of a complete skincare routine. If your main concern is the appearance of dark spots or uneven pigmentation, everyday habits can make a much bigger difference over time.
Gentle cleansing, regular moisturizing, and daily sun protection should remain the foundation of your routine. In particular, sunscreen is important because UV exposure can contribute to pigmentation and make existing dark spots more noticeable.
You also do not need to combine several DIY remedies at once. Using rice, oats, lemon juice, baking soda, scrubs, and multiple active ingredients together can make your routine unnecessarily harsh.
Give your skin fewer things to fight with and more time to recover.
Think Long-Term, Not Overnight
One of the biggest mistakes with DIY skincare is expecting immediate results. You might notice that your skin feels smoother or softer after using a DIY rice and oat face mask, but visible changes in pigmentation usually require more patience.
Instead of checking your skin every morning for a dramatic difference, focus on creating habits that you can actually maintain.
A gentle routine that you follow consistently is more realistic than an aggressive routine that leaves your skin irritated.
If you enjoy experimenting with simple rice-based beauty routines, you can also explore The Best DIY Rice Water Toner for Flawless Glass Skin: My 7-Day Secret for another easy rice-inspired skincare idea.
Listen to Your Skin
Your skin does not have to behave exactly like someone else’s. What feels soothing for one person may feel drying or irritating for another.
Before making the DIY rice and oat face mask a regular part of your routine, pay attention to how your skin reacts. Patch testing, gentle application, and avoiding unnecessary ingredients can help make your DIY routine more comfortable.
If you experience persistent irritation, significant acne, or stubborn pigmentation that does not improve, consider talking with a dermatologist. A professional can help identify the underlying cause and recommend options that are appropriate for your skin.
The Simple Takeaway
At the end of the day, you do not need a complicated beauty routine to take good care of your skin.
Keep your DIY rice and oat face mask simple. Use it gently. Do not expect overnight results. Moisturize afterward, protect your skin from the sun, and give your routine enough time to work.
Most importantly, healthy-looking skin is about consistency, not perfection. Enjoy your DIY skincare as a simple self-care ritual, but let patience and good everyday habits do the heavy lifting.
Your skin does not need to be rushed. Keep it gentle, keep it consistent, and let the results develop naturally over time.
1 thought on “How to Make a DIY Rice & Oat Brightening Face Mask for Dark Spots (7-Day Glow)”